Showing posts with label baking. Show all posts

Tuesday, 19 May 2015

Baking | Mince Pies In May


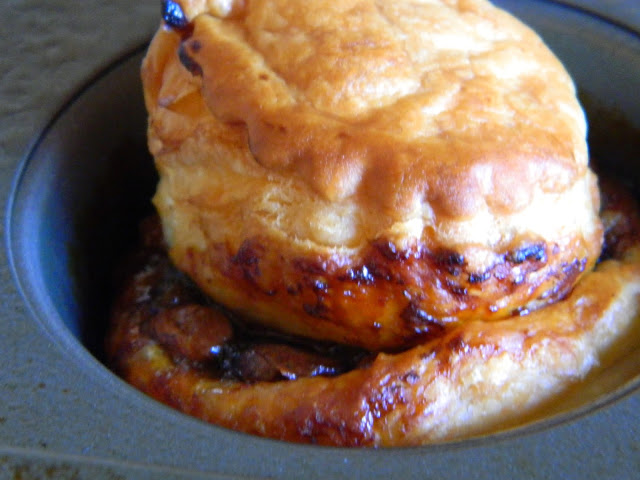
Me and my mum are both keen bakers, not only do we get to make yummy goodies but it's something we bond over. So when we remembered we still had a jar of mincemeat in the cupboard (which has a long shelf life thankfully) we thought we would have a crack at making mince pies. After all who says it has to be Christmas to enjoy these little mounds of heaven, can you tell I love mince pies? If it was my choice I would have them available all year round!


We decided to use puff pastry so ours came out a little differently to the norm but still just as delicious. Also to make things a little different in some of them we added chocolate chips, and yes it definitely works! They were possibly the easiest thing I've ever baked, it's as simple as cutting out the pastry with a cookie cutter, using a spoon drop a small amount of the mincemeat in the middle then cut out another piece of pastry for the top. We used a cupcake/muffin tray to bake ours and they only took 5-10 minutes to be ready to gobble up.

If you're ever feeling peckish, these are great to make as they are simple and quick.

Do you like mince pies? Would you like them more available throughout the year like me?


Saturday, 19 April 2014

Baking | Cookies From A Mason Jar


I'm back finally with another baking post! It's been a long time since I last posted a baking post and hope to add them more frequently into my blog in the future. So today I bring to you a little beauty I found in Homesense, which has quickly become one of my favourite stores to peruse when I'm in town. I found this SistersGourmet Triple Chocolate Chip Cookie Mix and thought it was such a cute idea I had to purchase it to try it out. So here's what you need...

SistersGourmet Triple Chocolate Chip Cookie Mix
1 1/2 Sticks Of Butter
1 Egg
1 Tsp Of Vanilla Extract

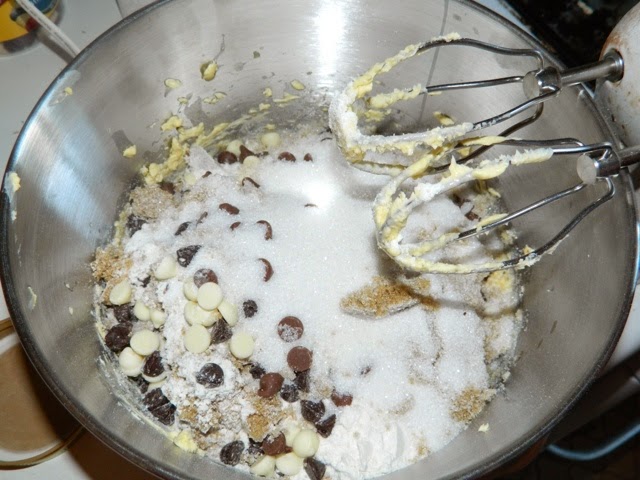
First soften the butter in a large bowl. It's best if the butter is at room temperature as it's easier to mix and you don't get lumps of butter. Next add the egg and the vanilla extract to the butter and mix. I put in a little more vanilla as I love it.


Next you want to add the entire contents of the mason jar which is all the dry ingredients. Make sure you have a rather large bowl or put in the dry ingredients a bit at a time.


Tip: If the dough isn't sticky enough and won't stick together add a bit of water to the mixture. I found I had to do this and I added about 2 Tbs which made it perfect.

Finally form little balls on a baking tray and bake for about 10-15 minutes. It states the mixture makes about 3 dozen but I varied the sizes to see how they would come out so I got about 15-20 out of it.


My final thoughts are... I love this idea!! They came out nice and tasty and couldn't find a fault in them. There were other types in Homesense so if they are still there when I go back I'm definitely going to give them a try.

If only this company wasn't American I would definitely order some more mixes from their website here.

What's your most favourite thing to bake?


Saturday, 10 August 2013

Baking | Stuffed Cookies


Hey everyone, long time no see! Just a quick update I am loving my job and am so excited and what's coming up for me. I'm still trying to get to terms with my shifts so will resume my blog very soon but today I thought as I have today off work and wasn't up to much else I would do what I love to do best... BAKE! I scoured Pintrest for a good couple of hours and saw so many wonderful recipes that I will try out one day but today I just wanted something simple and easy. So when I saw a couple of pictures of these I thought that is exactly what I want to make. These are super easy to make and you can choose so many different varieties.

So what will you need...
2 packets of Betty Crocker Chocolate Chip Cookie Mix
Your choice of filling (In my case it was Hersheys, Oreos & Peanut Butter Cups.)

Yes that is all you need. Now if your not lazy like I was feeling today you could make the cookie dough from scratch which I will try later another day.

First pre heat the oven to whatever the cookie mix says, mine was gas mark 5. Then I simply mixed up the cookie mix into a dough. I then took a small ball of the dough and squashed it down on the pre-greased tray. I took my choice of filling and lightly pushed it into the dough. I then took another small ball of dough and squashed it over the top and joined it up with the other piece of dough. Place in the oven for 10-15 minutes or until golden brown and voila bite into the yummy goodness you've just created.


Hope you enjoy recreating these if you do and let me know in a comment what your choice of filling was.

Tuesday, 30 July 2013

Baking | Hershey's Kisses Cookies & Cream Cookie Bars


So once again Becky over at milk bubble tea has got me hooked on the amazing recipes she finds online and has me needing to try and recreate them. I've done some posts in the past of my attempts at recreating some delightful recipes found on her blog so I thought I would bring you another one.
American chocolate is a marmite product to us brits, with the UK being the home of Cadburys which we all know is ah-maze-ing chocolate some people just don't like the American brown stuff (most likely it will have been Hersheys). I on the other hand love it. It is completely different to our chocolate but there is just something about it I love. So with that in mind when I saw this recipe I knew I had to remake it. The clue is in the title of this post... Hersheys Cookies & Cream Kisses!! I looked on the site where Becky found the recipe from which is called Picky Palate which is just another amazing baking site and followed from both really. So firstly what do you need to make these amazing little cookie bars of goodness...

1/2 cup softened unsalted butter
1 cup of white sugar 
1 large egg
1 1/2 cups of plain flour
a pinch of salt
1/2 tsp of baking soda
1/2 bag of chocolate chips
10 oreo biscuits
10 hershey's kisses, cookies and cream flavour.

First pre heat your oven to 180 degrees which is gas mark 4/5 and let that heat up whilst you start preparing these yummy treats. In a bowl mix the butter (its best when it's at room temperature, easier to mix!) and add the sugar and egg and mix well. Next add in the flour, salt & baking soda and mix then fold in the chocolate chips. Crush up the oreos either with your hands on bash them with a rolling pin and mix in. Line a dish or I used a brownie tin with tin foil and spread half the mix in the tin. Place a Hersheys kiss evenly around the tin and push into the dough. Then use the remaining mix to cover the kisses. Bake for around 25-30 minutes.


Now fair to say mine didn't come out looking quite as scrumptious as Becky's did but they were still super yummy! And you know what they say, Practice makes perfect!!

Do let me know if you take a attempt at making these, I would love to see what yours look like.


Thursday, 20 June 2013

Ice Cream Cupcakes


I'm back with another baking post and it's another sweet treat. My mum made these for her work at christmas time and I've been meaning to make them for myself but just hadn't got round to them until now!

It's pretty simple all you need is some Ice Cream cones but you need the flat bottomed ones so they can stand in the muffin tray whilst they are baking. Either make your cake mix from scratch or like me I just trusted good old Betty Crocker. I decided to go for Red Velvet as a bit of a difference. Then I  had a can of Betty Crocker cream cheese icing spare or of course you can whip up your own.


Mix up your cake mix then pour into the cones. I went about 3/4 full so they didn't rise over the top and they turned out perfect. Then once cooled apply your icing. I did try my hardest to make it look like ice cream but i'm still practicing on my piping skills. I chose to decorate mine with chocolate chips because I didn't have any flakes to hand but with a flake stuck in it really looks like a cute little 99!


These would be perfect for a birthday party or a summer party to have as little snacks. Have you ever made these? If you have let me know!


Monday, 27 May 2013

Peanut Butter & Oreo Chocolate Cupcakes


I'm back today with another food post (expect a lot more of these on my blog!) and one that if your a chocolate/peanut butter/oreo lover your in luck. This is another post influenced by the lovely Becky from milk bubble tea and if you have the craving to bake then her blog is a must read as she has lots of lovely recipe ideas.

What you will need is...
- A packet of Oreos
- Peanut Butter
- Chocolate Cake Mix (I chose Betty Crocker because you just can't go wrong!)
- Eggs, Water and Oil (optional depending on the cake mix)

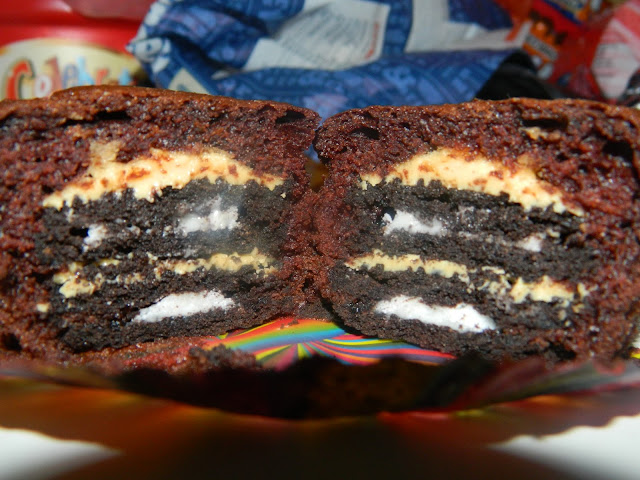
First things first is to stack the oreos. Take one and spread some peanut butter on it. I used smooth but if you want an extra bit of nuttiness go for crunchy. Tower it up with another oreo and again another layer of peanut butter.


Next thing is the tricky part. Once you've whipped up your cake mix, pour it into each cupcake case. Now I found it easier to do with a small teaspoon and pour the mix down the sides first and then cover over the top. Cook in the oven on gas mark 4/5 for about 20 minutes or until the cake is properly cooked. And voila, you could ice them but I couldn't be bothered I wanted to tuck straight into them. But next time I make them I think I'm going to whip up a peanut butter frosting.


Have you made these before?


Thursday, 23 May 2013

Homemade Chocolate Candy Bark


On the journey to making my blog more lifestyle I bring you a baking/food post. I love to bake and its something me and my mum do and we kind of bond over it it a nice little way. So I love it even more when I come across blogs with amazing recipes such as Milk Bubble Tea which is where I discovered today's yummy post.

Recently chocolate company Cadburys have released chocolate bars with sweets or cookies inside them so Becky's homemade version of these looked like a winner. With no baking involved and only taking 5-10 minutes and a short time in the fridge to prepare these are definitely a fun thing to do when your bored.


All your need is some chocolate and lots of your favourite sweets. I used smarties, cola bottles, mini marshmallows, teeth and lips and Haribo. All you need to do is melt your chosen chocolate in my case I did one made with milk chocolate and one with white chocolate. Then pour onto a plate, I lined mine with tin foil to make it easy to remove once set. Take your sweets and decorate, be as neat or messy as you like and pop in the fridge to set. After it's set break it up into chunky pieces and enjoy!


These are a tasty treat and perfect for any party or girly night in.
Thanks again to Becky for posting this recipe and introducing me to this amazing treat.

Have you made anything like this before?